I had planned on sharing a new pie recipe today, but yesterday I showed a picture on Facebook of an item in my new kitchen that I love and many of you asked if I could share what I did to make them.
So, I will be sharing the new pie recipe tomorrow. Today, you are getting a little look at my new kitchen and one of the things I love about it.
I am going to share about my new kitchen and what we did soon. There are a few things left to do, just cosmetic things, but things that I want to fix before I share photos on my site, so today I am just sharing one area of my kitchen.
One of the things we choose not to change in the kitchen was the windows. The window I am showing today is in a bit of an odd spot, but it lets in so much light and moving windows is not cheap, so we kept the window and I am making it work.
The colors are kind of off in the photos today due to the bright light coming in when I took pictures. I love the amount of natural light I have in the kitchen. It makes working in the kitchen so nice. It is not so nice for taking photos of the kitchen, but it functions great when we are in the kitchen, so I cannot complain.
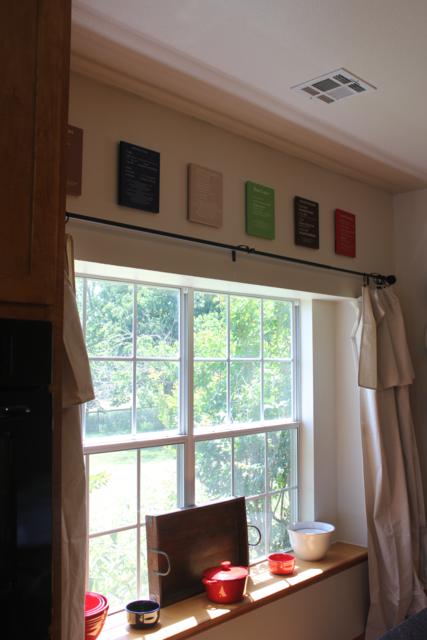
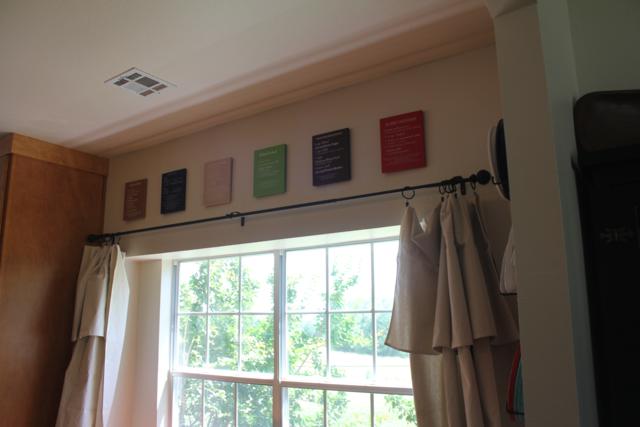
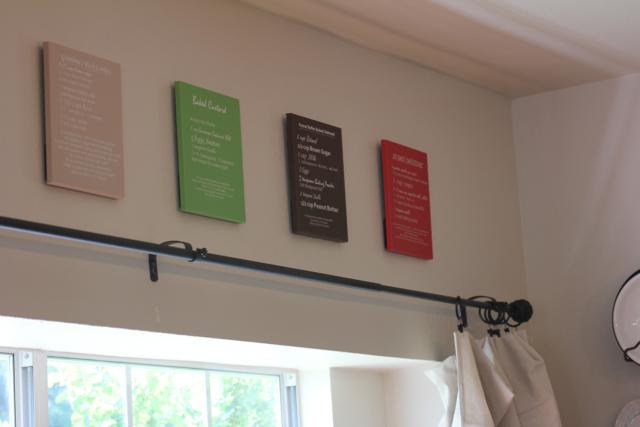
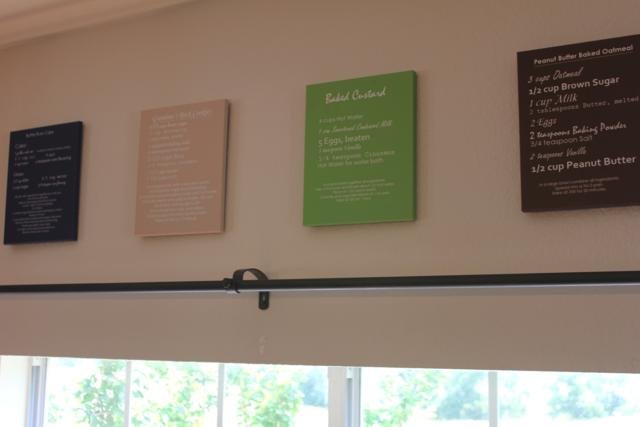
This is a large window and we have tall ceilings, so there is a large space above the window that I knew I wanted to decorate. My goal with the new kitchen was to keep the design and decor simple, so I did not want to put a lot above the window.When it comes to decorating my house I like things that mean something and I wanted to keep that in mind with the kitchen area also.
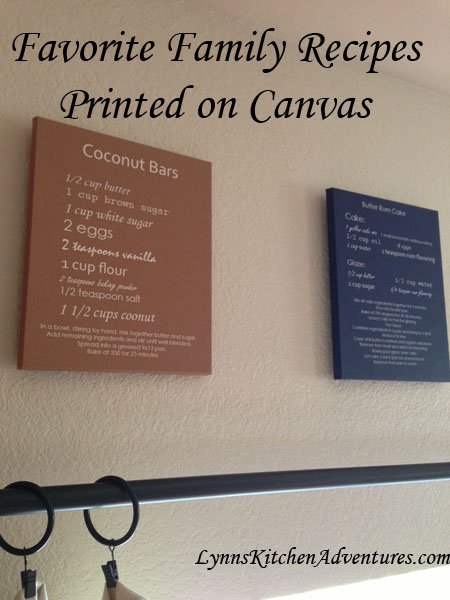
One day when I was looking around Etsy, I noticed a few shops that were selling recipes printed on canvas and I instantly loved the idea. However, they were a bit expensive and they were just basic recipes for apple pie and other recipes that I had no idea where they came from. I wanted to find a way to get the same look with my favorite recipes.
I did some research and found a few companies that will take recipes you choose and print them on canvas, but again it was a bit expensive. The rest of my kitchen was quite a project and I needed to keep the cost on the decor down, so if I wanted recipes printed on canvas I was going to have to find a way to do it myself.
And really it was not hard at all to figure out. If I can do this, anyone can do this.
Ok, well I will say it is easy if you have basic computer skills and have used a program like photoshop. If you can’t do that, maybe you can find a friend or relative that can help you.
The first thing I had to do was choose the recipes. I wanted recipes that meant something to me, so I decided to use family recipes that had been passed on to me.
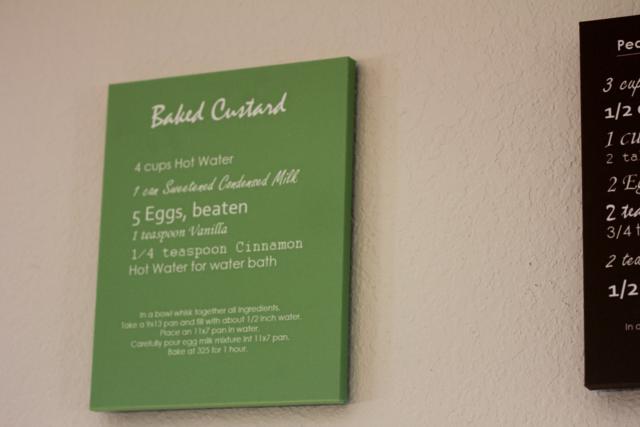
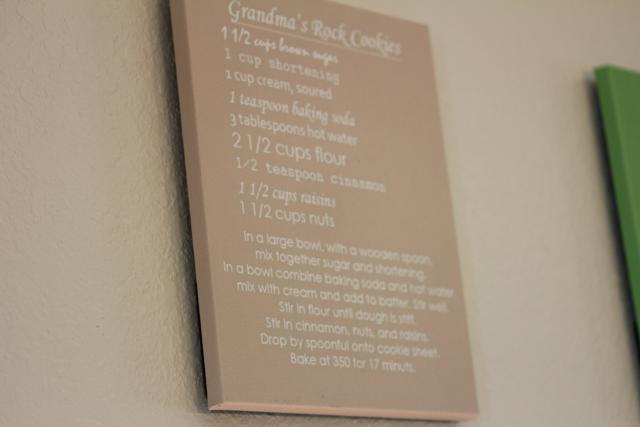
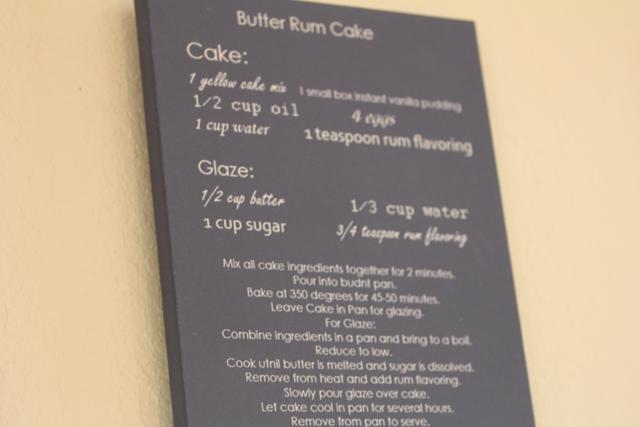
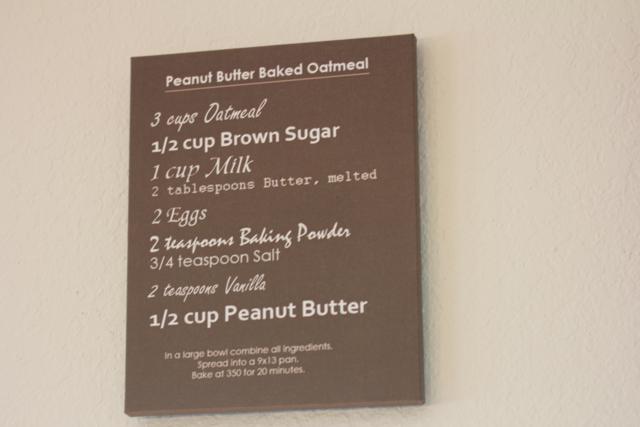
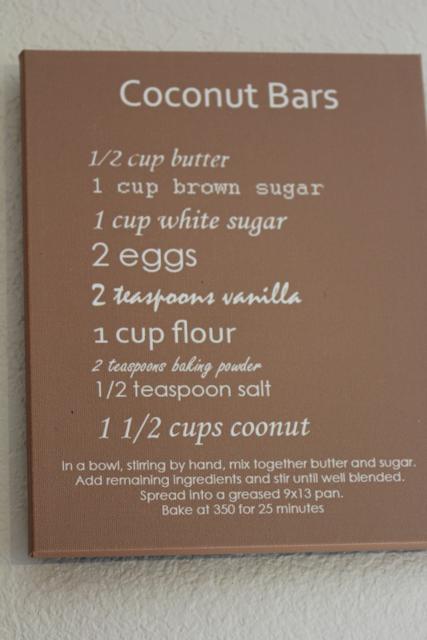
I choose my husband’s grandmother’s butter rum cake, my grandmother’s rock cookies, my mom’s coconut bars, my mother in-laws custard, my peanut butter baked oatmeal, and a no bake cheesecake recipe that my mom made all the time and that came from my best friend’s mom.
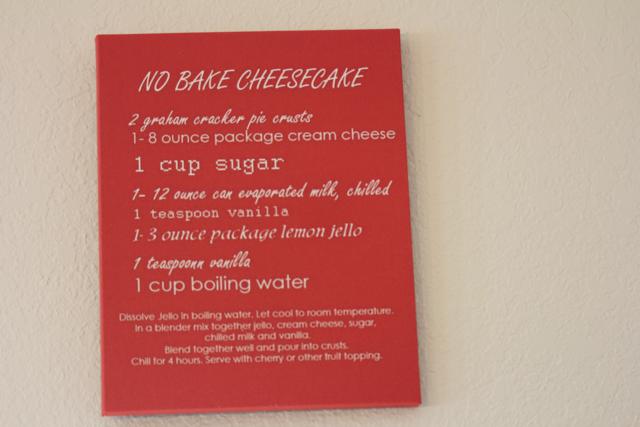
All I did was pick a colored background and added the recipe by typing it in how I wanted.
I wanted some of the pictures to be neutral type colors so I went with different shades of brown for three of them. For the other colors I decided to match them to some of my Fiestaware dishes. It is hard to tell in the pictures, but the colors are pretty close to the red, cobalt blue, and green of Fiestaware. That one below is blue, not sure why it looks gray. And the walls are an off-white and not at all like the picture looks.
I wanted to make them a little fun, so I used several different fonts on each print, but you could easily do just one if you want more of a classic look. I saved the image as a jpeg, making sure to allow enough room on the sides of the print to wrap around the canvas.
Now, this took some time for me to get it just right, but it was worth the time I spent to get the look I wanted for a price I was willing to spend.
Once I had them just how I wanted, I uploaded the jpeg image to the Sam’s Club website just like you would a photo. When you choose a canvas for the printing, you can preview the image to be sure your margins are right. I choose to print them on 8×10 canvas, but you could easily do these larger or smaller.
I think if I had looked around I could have found a better price than Sam’s Club, but Sam’s Club only cost me $12.96 for an 8×10 print and I thought that was a good deal. Prices may vary on that depending on your Sam’s Club, but you should easily be able to do it for $20 or less.
I noticed with these pictures, that the canvas prints don’t photograph well, but in person they are very clear and look great.
I now have some fun and unique wall art that means something to me. Every time I see these I think of my family. And since they are recipes, they are perfect for a kitchen.
One of my readers asked on Facebook if you could also do this with hand written recipes and I think you could. In fact, I think that is a great idea. You should be able to scan the recipes in and do the same basic thing in Photoshop or another program to give it a background and turn it into a jpeg. For a hand written recipe you might just need to do a smaller size to keep it clear.
Have any of you seen this done before? I would love to hear your thoughts.
And if any of you computer graphic design type people have suggestions of better ways to do this, I would love to hear. I totally just figured out how to do this as I went along. There may have been an easier way.

I LOVE LOVE LOVE this idea and thank you for sharing!
Love this idea! Think I see a Christmas Gift in the future!!!!!
Yes, I think they would make great gifts and they really are not that expensive to give as gifts.
Love this idea! I make other canvas “prints” with Scripture and favorite sayings by printing the words on cardstock (whatever color I choose) and then using Mod Podge to adhere the cardstock to a blank canvas! You can color the edges of the canvas by painting with any acrylic paint (before adhering the cardstock) and when the first layer has dried the Mod Podge can be “painted” over the top of the whole thing to give it a nice finish and a little protection, too.
That would be a great way to do this also. Thanks for sharing that idea!
Love this! I have a recipe of love that I found at hobby lobby so this will your in great with this!
I love that! I would have never thought to do that! Looks great!
Thanks! I am really happy with how they turned out.
ABSOLUTELY wonderful! Those would be great wedding gifts for a daughter or daughter-in-law!
I agree! They would make great gifts.
Very clever!
And, you didn’t inherit any of Grandma’s “artsy crafty” tendencies?!
Dad
That is so neat and I love the colors you chose. The different fonts make them perfect. Thanks for sharing with us!!
Love this idea! I think it would be a great gift idea. Thanks for sharing.
What an awesome idea. This would make a great gift for a love one.
I absolutely am in love with the idea of this! When I make some kitchen changes I am definitely doing this!!
Thanks!
This is a great idea! Not to be a spoil sport but your Coconut Bar recipe has coconut misspelled – “coonut”. I only point this out because once I noticed it, it would drive me crazy until I got it fixed. My hobby is holiday yardart. I’ve done hand painted signs for my crafts. My medium is foamboard & wood but the same principals apply to any medium such as canvas. I paint the background color on my medium & let it dry thoroughly. Then print the words on paper using my word processor and printer. I stick clear packing tape over the words or drawing to make it more durable. Then I place a piece of tracing paper between the medium & printed paper and using a stencil tool (a ball point pen works too & you can see where you’ve traced) draw the wording. This is where the durability of the packing tape is a help. Then I paint the letters. Here you can get creative by using different paints & colors. It’s kind of tedious but any imperfections become a part of the art.
Another reader pointed that out as well and yes it is driving me crazy. I read through those a ton before I did them and so did my daughter to catch any errors in the recipes and we both missed that! And yes I will be getting that redone because it will drive me nuts. Thanks for letting me know! And I love your idea too. I think you could do this same basic idea so many ways to create unique art and gifts. Thanks for sharing that.
Love this, Lynn! The personal touches is what makes a room, especially a kitchen, meaningful. Thanks for sharing how you did it.
love this idea but think i would add the name of the originator ie Grandmother Smith’s and date it for future generations … this would also be a great gift for new family members … definitely putting this in my gift idea file
thanks
I love these! I had the same thought as others–great gifts for my daughter who is getting married soon.
Love this!!! I have a similar spot in my kitchen and I didn’t want anything too heavy but I wanted it to be something personal. What a great way to honor family traditions and decorate at the same time!! Thank you so much for sharing!
I Love these!! My grandson is getting married in July & a friend is helping me make several of these for their wedding gift. I know my new granddaughter in law will love them..Thanks for a great idea!!!!
I am a newbie to crafts. What did you attach recipe too and did you use glue?
I loved this idea! I’ve been searching for some wall art to go in our new home since we bought it 2 years ago. I didn’t want the over done coffee art (which we had for a few years) and not the fat chef motif. We also needed something that went with the cooking section of kitchen that has utensil inspired art but I couldn’t find anything to carry over into the eating section.
This idea worked out better than planned! I used different wood patterns for the background and had them done on “wood panels” from Walgreens.
It fit all of my criteria – it flows, it was inexpensive, it was easy, more original, looks great and had the added bonus of being persona, which I love! So thank you for the grand idea! Also, the girl who print these for me said she is also stealing the idea!
I am so glad it worked so well for you! I still have mine hanging in my kitchen and love them!
Just wondering how much you allow for margins all around on 8×10
I believe I added about 2 inches to the width and height. I had to play around with it to get it just right. When you load the image up it should show you what wraps around so you should be able to tell if the margins are right before you actually order it. I hope that helps.
What canvas company did you use.
I got them done at Sam’s Club. Most places that do photos can now do canvas ones. Places like Sam’s Club sometimes even run them on sale. I hope that helps.